TABLE OF CONTENTS
Overview
Use the directions below to import the Trust Center Virtual Machine Using Hyper-V Manager.
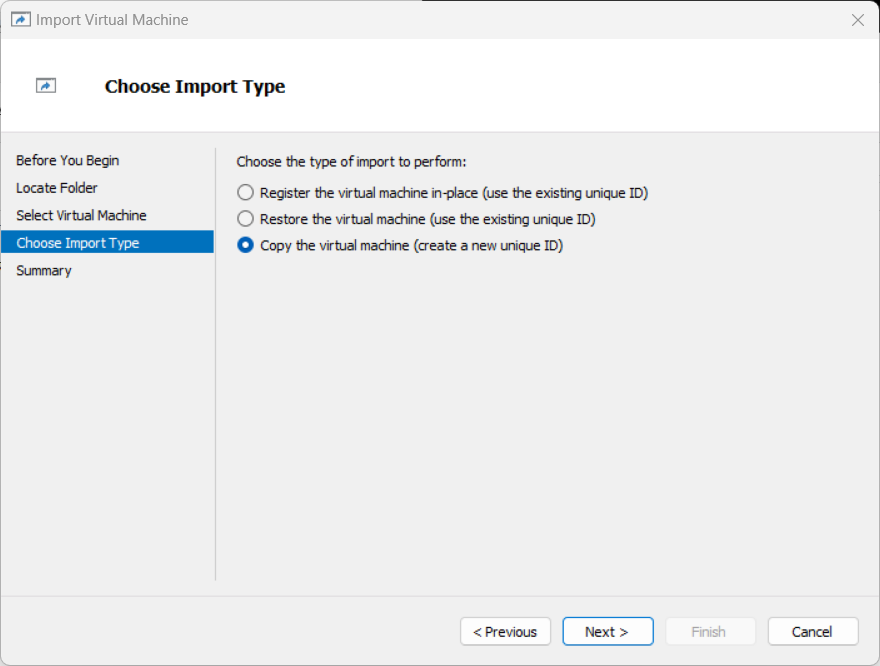
Note: Cloning of a Trust Center virtual machine is not supported. Each Trust Center instance is licensed with a unique identifier, and cloning the VM will invalidate the license. Attempting to start a cloned instance will result in the license breaking and the Trust Center becoming inoperable. Use the Export/Import feature to move the Trust Center. When importing, you must select Use existing unique ID to preserve the original license.
Before You Begin
ARIA will provide you with a zip file with the Hyper-V Trust Center Virtual Machine. This zip file should be extracted prior to beginning these steps.
Steps
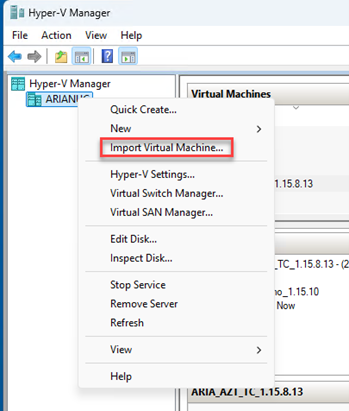
- Go to Hyper-V Manager. Select the local computer you would like to use as the host.
- Right-click on the computer name. Select Import Virtual Machine.
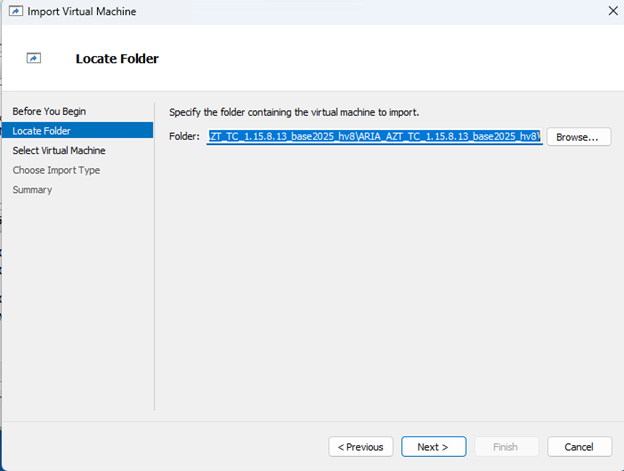
- On the Import Virtual Machine pop-up, select Next.

- Select the ARIA_AZT_TC_HYPERV_<VERSION> folder that contains the exported files. Click Select Folder.

- Select Next.
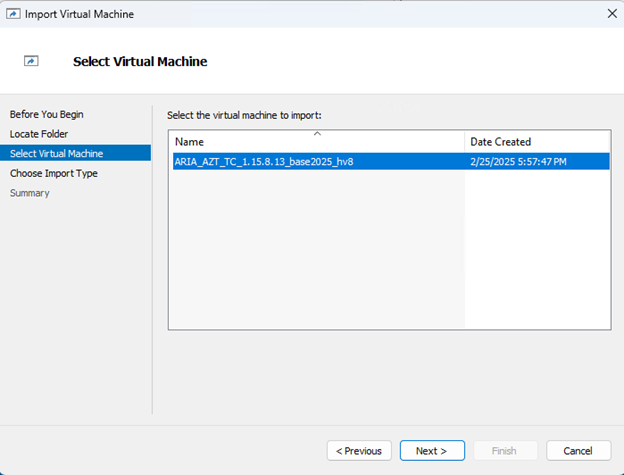
- Select the virtual machine to import. Select Next.
- Select Copy the virtual machine (create a new unique ID). Select Next.
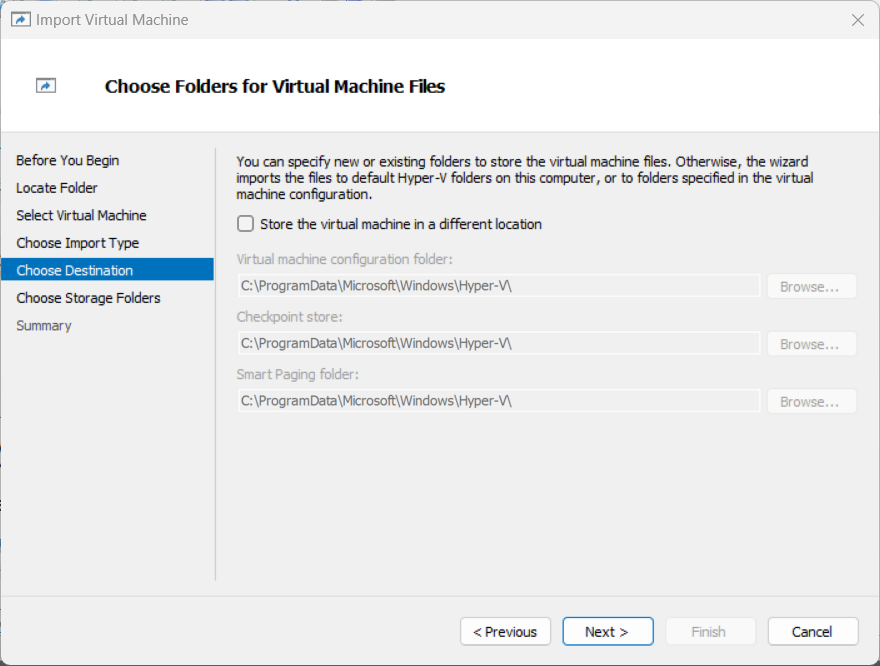
- Configure where you would like the virtual machine files saved or leave the default select. Select Next.
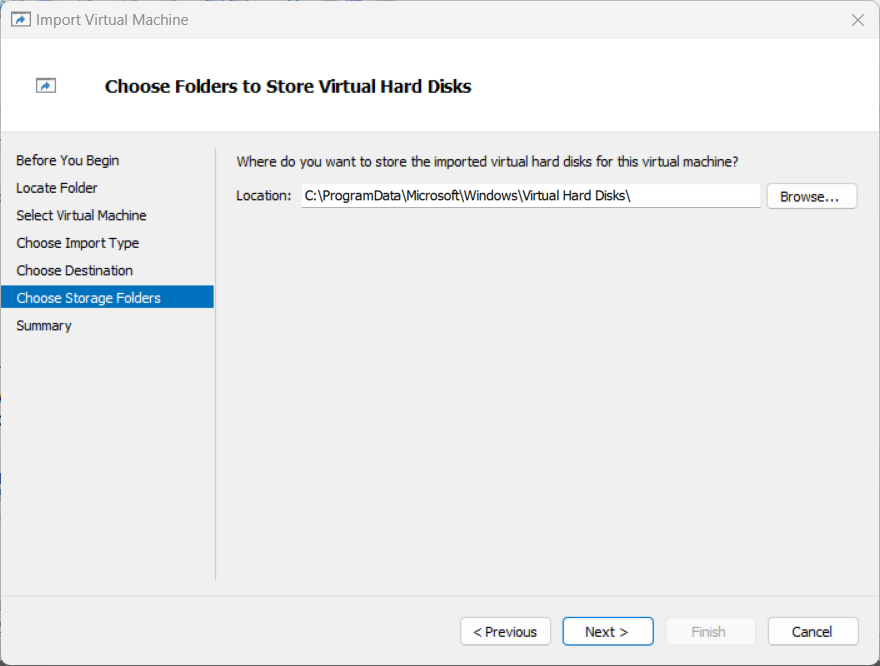
- Configure where you would like the virtual hard disks saved or leave the default selected. Select Next.
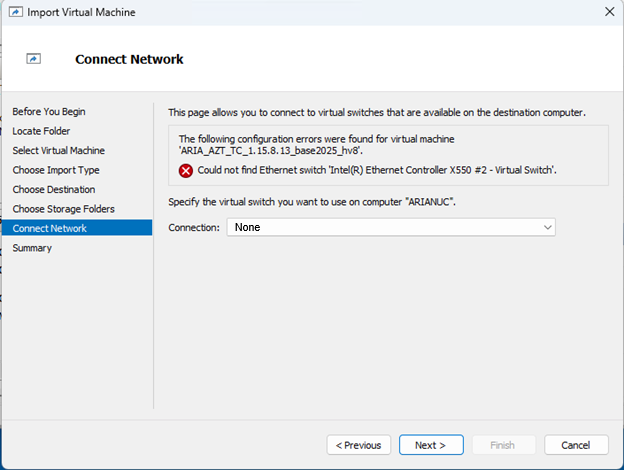
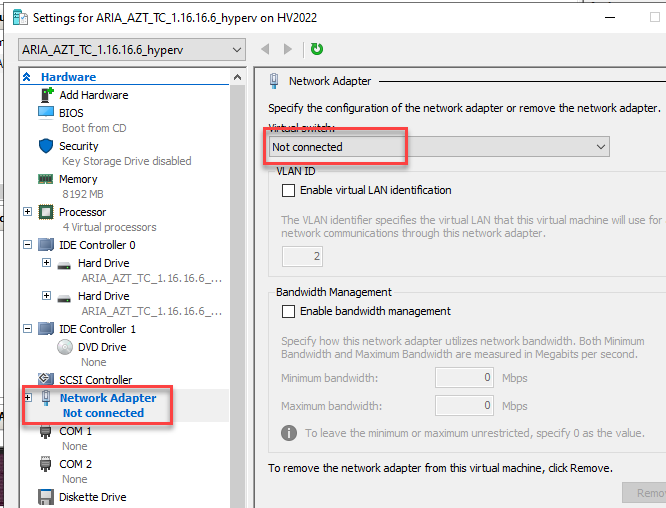
- Leave the connection set to None. Select Next.
- Review the details on the summary page. Select Finish.

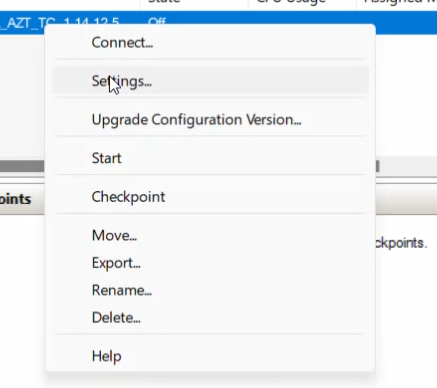
- Right-click on the virtual machine. Select Settings.
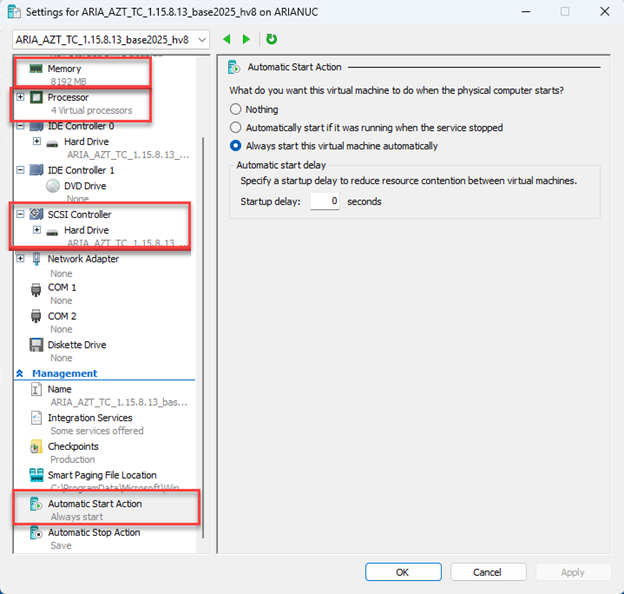
- Configure the Memory, Processor, and Drive 2 based on the number of endpoints your Trust Center will have, then set to auto start. See Hardware and Software for configuration guidance. Select OK when you are finished.
- Start the machine and open a console to perform the post-installation steps. See Configure the Post Install Wizard.
- After completing the post install wizard, you should let the system run for at least two hours, then return to the Hyper-V Manager and connect the Network Adapter to the Trust Center.
Was this article helpful?
That’s Great!
Thank you for your feedback
Sorry! We couldn't be helpful
Thank you for your feedback
Feedback sent
We appreciate your effort and will try to fix the article