TABLE OF CONTENTS
Overview
VisualSVN Server allows you to easily install and manage a fully-functional Subversion server on the Windows platform. VisualSVN Server has an inbuilt Apache HTTP web server. We are going to see how to install and configure the VisualSVN server by creating SVN User and repository and finally access that repository in the browser.
Steps to Install
Step1. Download Visual SVN Server: https://www.visualsvn.com/server/
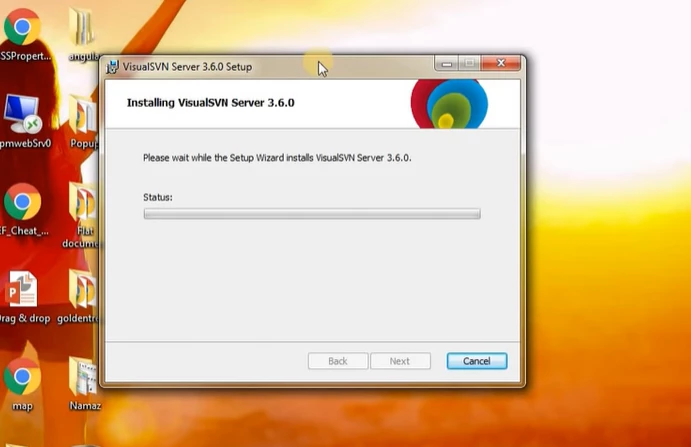
Step2: Setup the installation
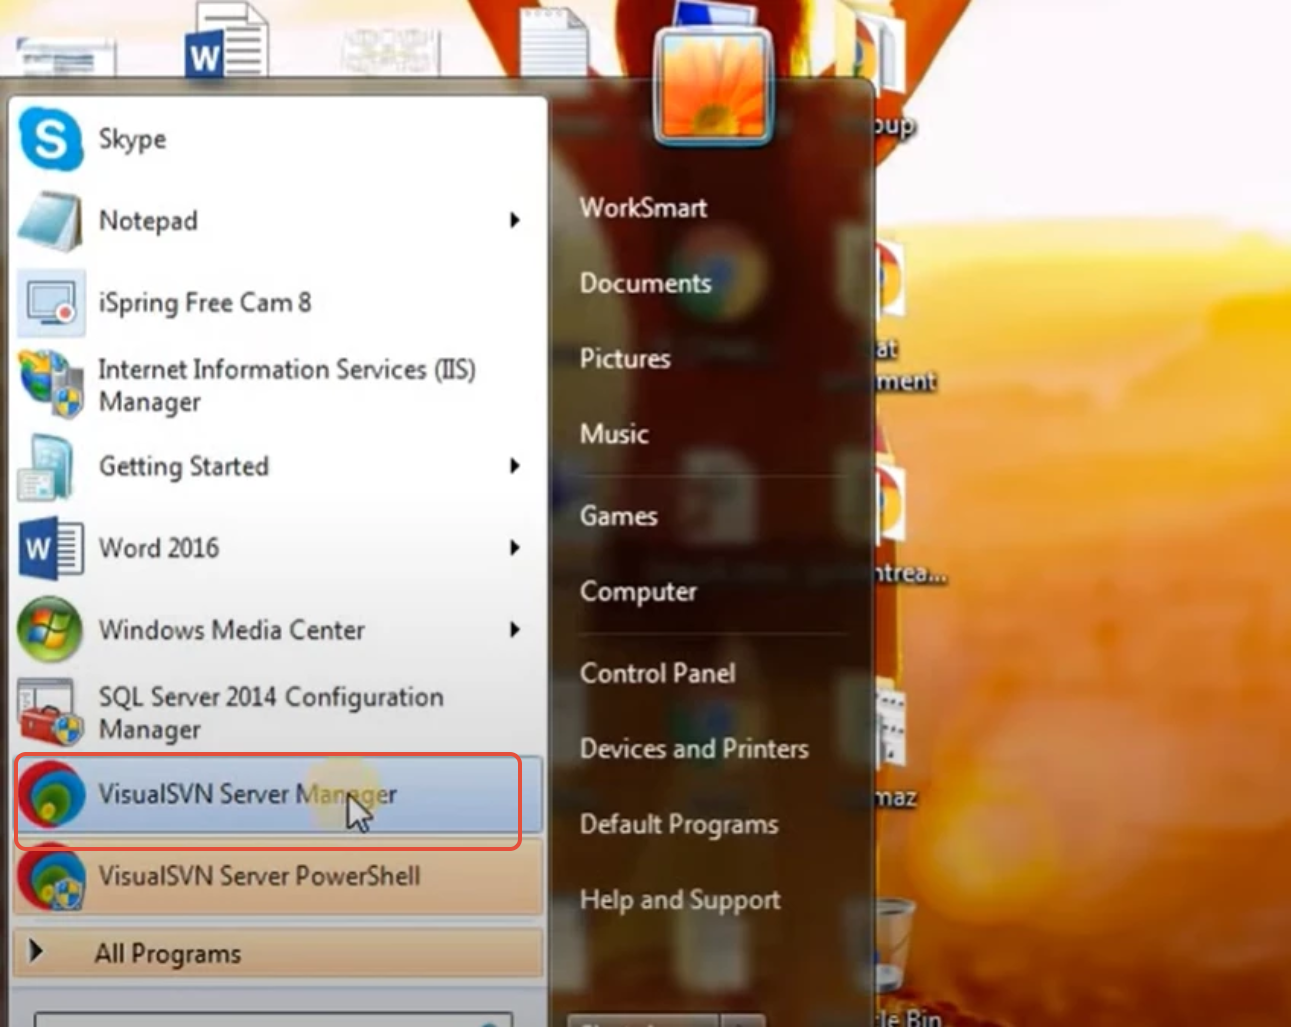
Step 3: Go to the start menu and open VisualSVN Server Manager
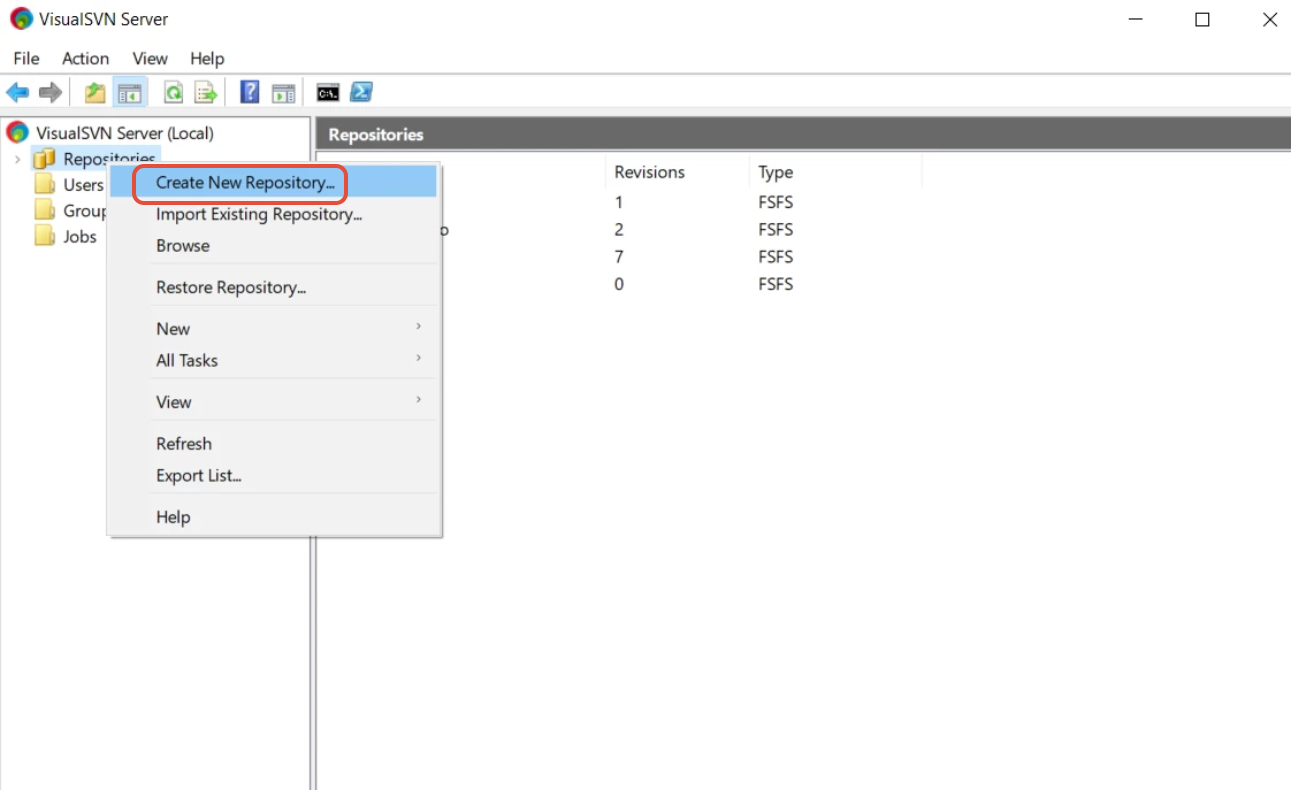
Step 2.1: Create a repository.
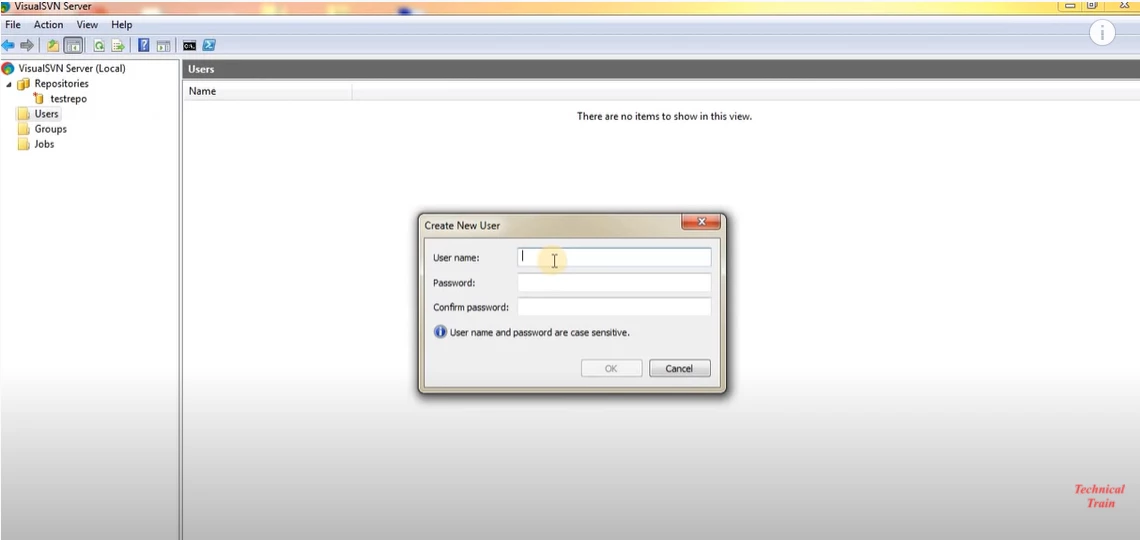
Step 2.2: Create a New User.
Step 2.3 Assign this user to the particular repository.

Step 2.4 Click on Configure logging and enable both.
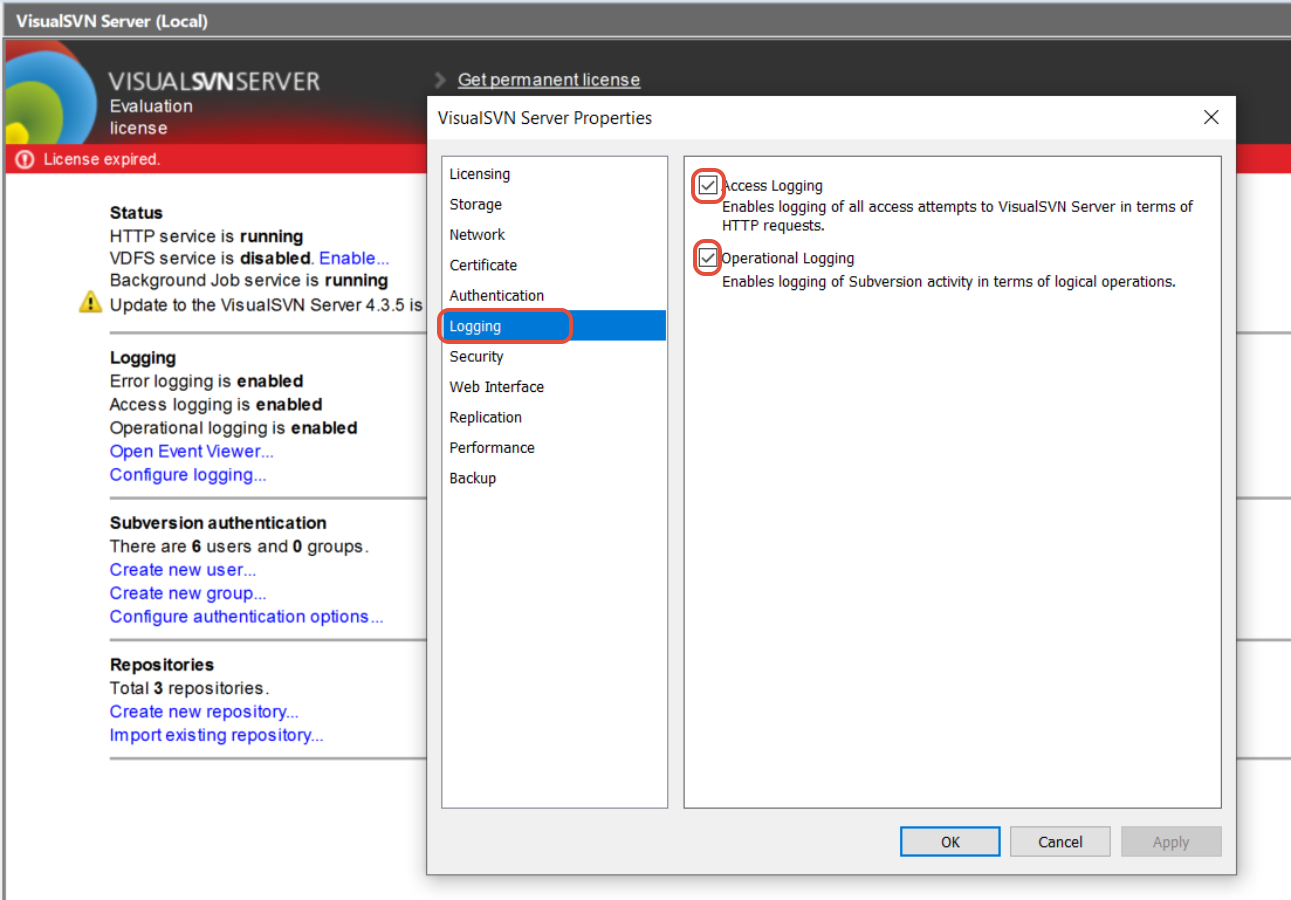
Step3: Open the Nxlog configuration file at:
C:\Program Files\nxlog\conf\nxlog.conf (Be intact to the mentioned path)
Run notepad or notepad++ with the administrative rights.
Open the nxlog.conf file.
Replace the configuration file by pasting the following - Note to replace the variable (
IP Address of Seceon Collector) mentioned in point 52 below with the actual ADR Server IP address:
#define ROOT C:\Program Files\nxlog

define ROOT C:\Program Files (x86)\nxlog
define ROOT C:\Program Files (x86)\nxlog

Moduledir %ROOT%\modules
CacheDir %ROOT%\data
Pidfile %ROOT%\data\nxlog.pid
SpoolDir %ROOT%\data
LogFile %ROOT%\data\nxlog.log

<Extension _json>
Module xm_json
</Extension>
define aisiem
1, 3, 4, 5, 6, 7, 8, 9, 10, 12, 13, 14, 15, 17, 18,19, 20, 21, 104, 258, 259, 260,
261, 262, 500, 517, 520, 528, 529, 530, 531, 532, 533, 534, 535, 536, 537, 538, 539,
540, 551, 552, 565, 600, 608, 609, 621, 622, 626, 627, 628, 629, 630, 636, 642, 644,
645, 647, 632, 663, 664, 671, 673, 675, 676, 677, 679, 680, 681, 682, 683, 684, 689,
690, 692, 1001, 1006, 1007, 1008, 1015, 1102, 1116, 1117, 1118, 1119, 2003, 2100,
7034, 4624, 4625, 4634, 4647, 4649, 4656, 4657, 4659, 4661, 4663, 4670, 4688, 4697,
4704, 4705, 4717, 4718, 4720, 4722, 4723, 4724, 4725, 4726, 4727, 4728, 4729, 4730,
4731, 4732, 4733, 4734, 4735, 4737, 4738, 4739, 4740, 4741, 4742, 4743, 4744, 4745,
4746, 4747, 4748, 4749, 4750, 4751, 4752, 4753, 4754, 4755, 4756, 4757, 4758, 4759,
4760, 4761, 4762, 4763, 4764, 4767, 4769, 4771, 4772, 4773, 4775, 4776, 4777, 4778,
4779, 4780, 4782, 4783, 4784, 4785, 4786, 4787, 4788, 4789, 4790, 4791, 4793, 4794,
4797, 4798, 4800, 4801, 4802, 4803, 5001, 5004, 5007, 5010, 5012, 5136, 5137, 5140,
5141, 5142, 5143, 5144, 5145, 5376, 5377, 7045, 8003, 8004, 8007, 64004

<Input in>
Module im_msvistalog
Query <QueryList>
<Query Id="0">
<Select Path="Security">* </Select>
<Select Path="Application">* </Select>
<Select Path="Setup">* </Select>
<Select Path="System">* </Select>

<Select Path="VisualSVNServer">* </Select>

<Select Path="VisualSVNServerActivity">* </Select>
</Query>
</QueryList>
<Exec>
if ($EventID NOT IN (%aisiem%)) drop();
</Exec>
</Input>

<Output out>
Module om_udp
Host CCE_IP_ADDRESS
Port 5154
Exec to_json();
</Output>

<Route 1>
Path in => out
</Route>
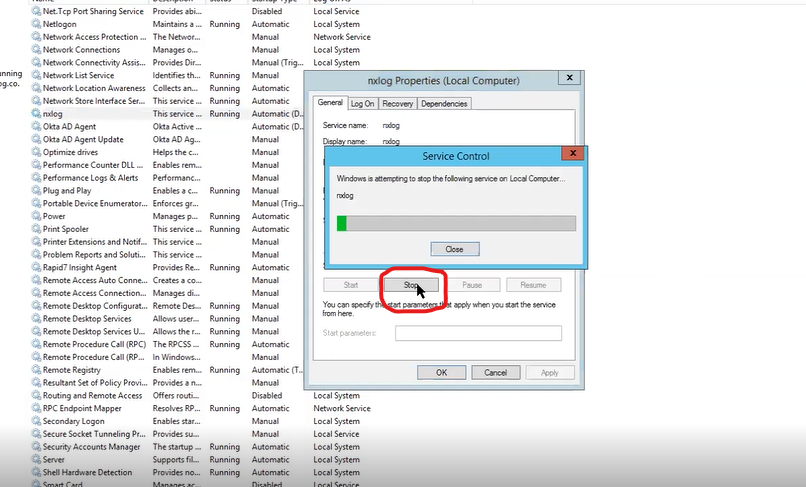
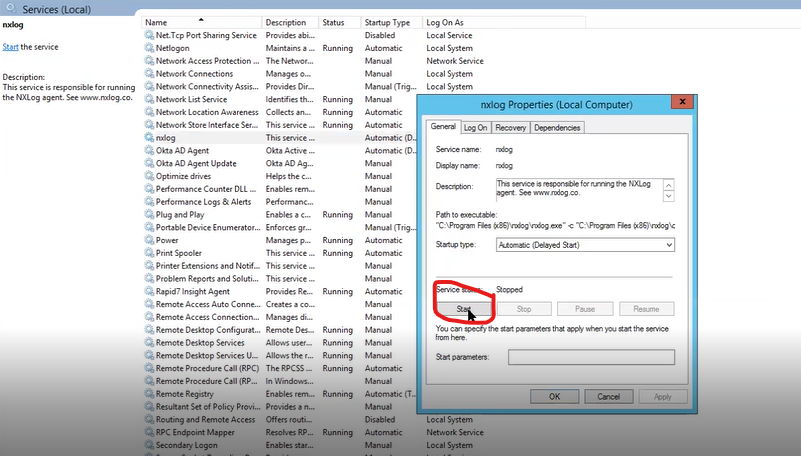
Open Services (from the search box on your Windows) and restart nxlog from the list of services. If you do not find this service, type the following commands at an elevated (as an administrator) command prompt:
net stop nxlog
net start nxlog
Click on: NXlog
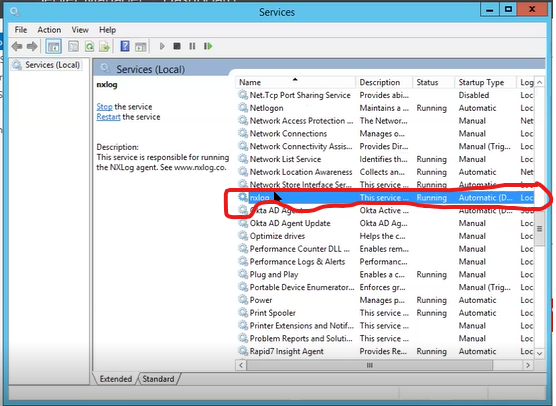
2. Click on: Stop
3. Click on: Start
Search for: Local Policies in the search box again.
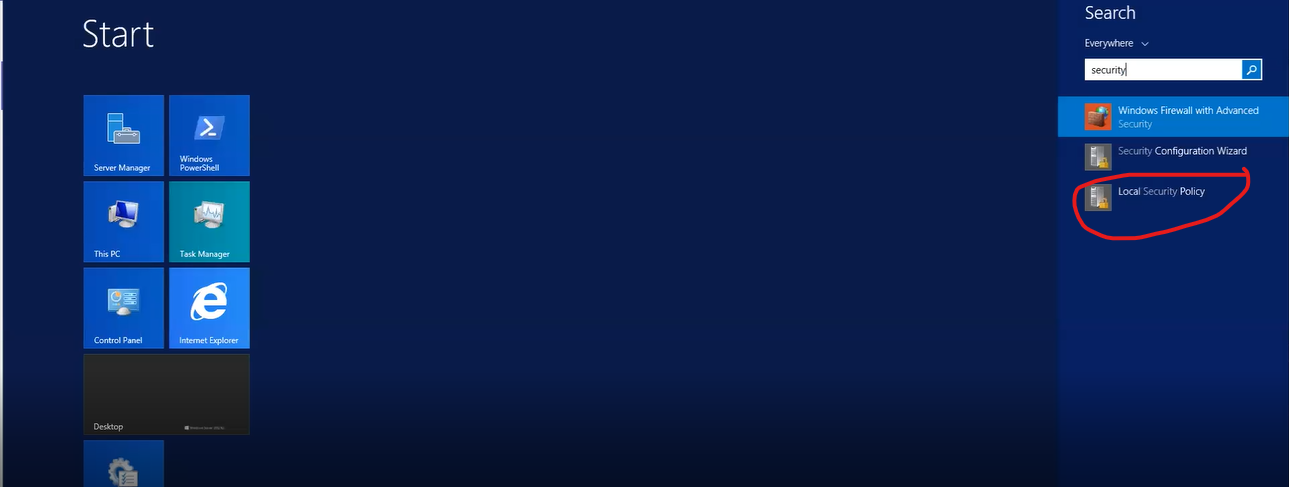
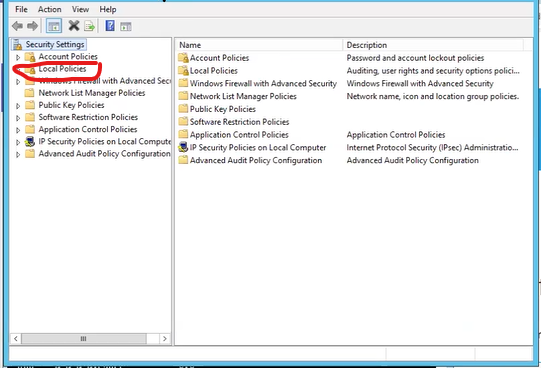
Click on: Local Policies
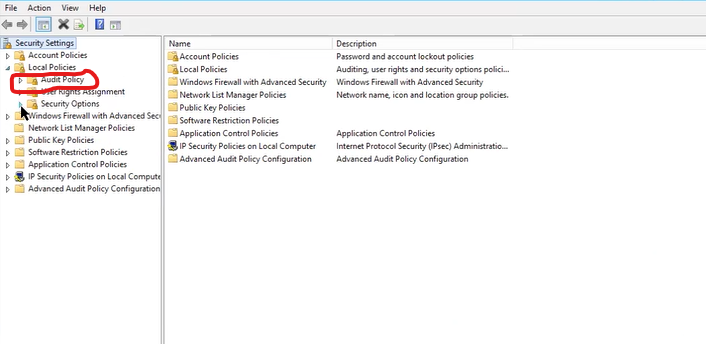
Click on: Audit Policy
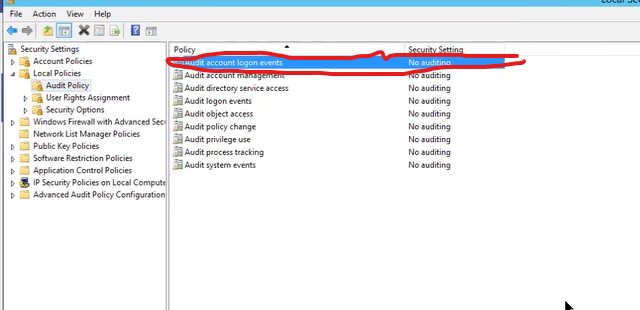
Click on Success and failure checkbox >>Apply >>OK.
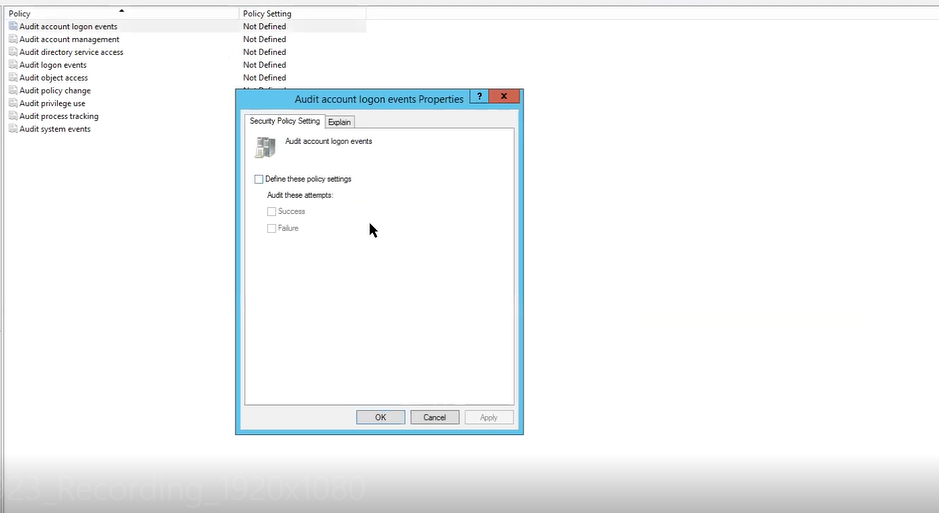
Repeat this for all policies one by one.
Enable audit logs:
Open Command Prompt, once policies are enabled, and run the command gpupdate /force, to validate that the policies are enabled.

Verification (MSSP Only)
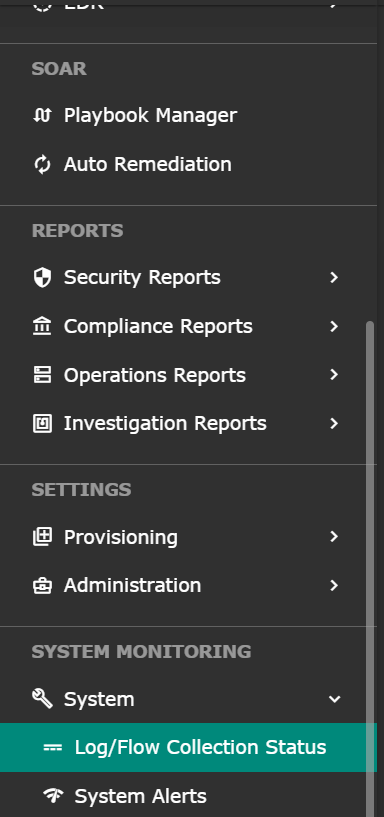
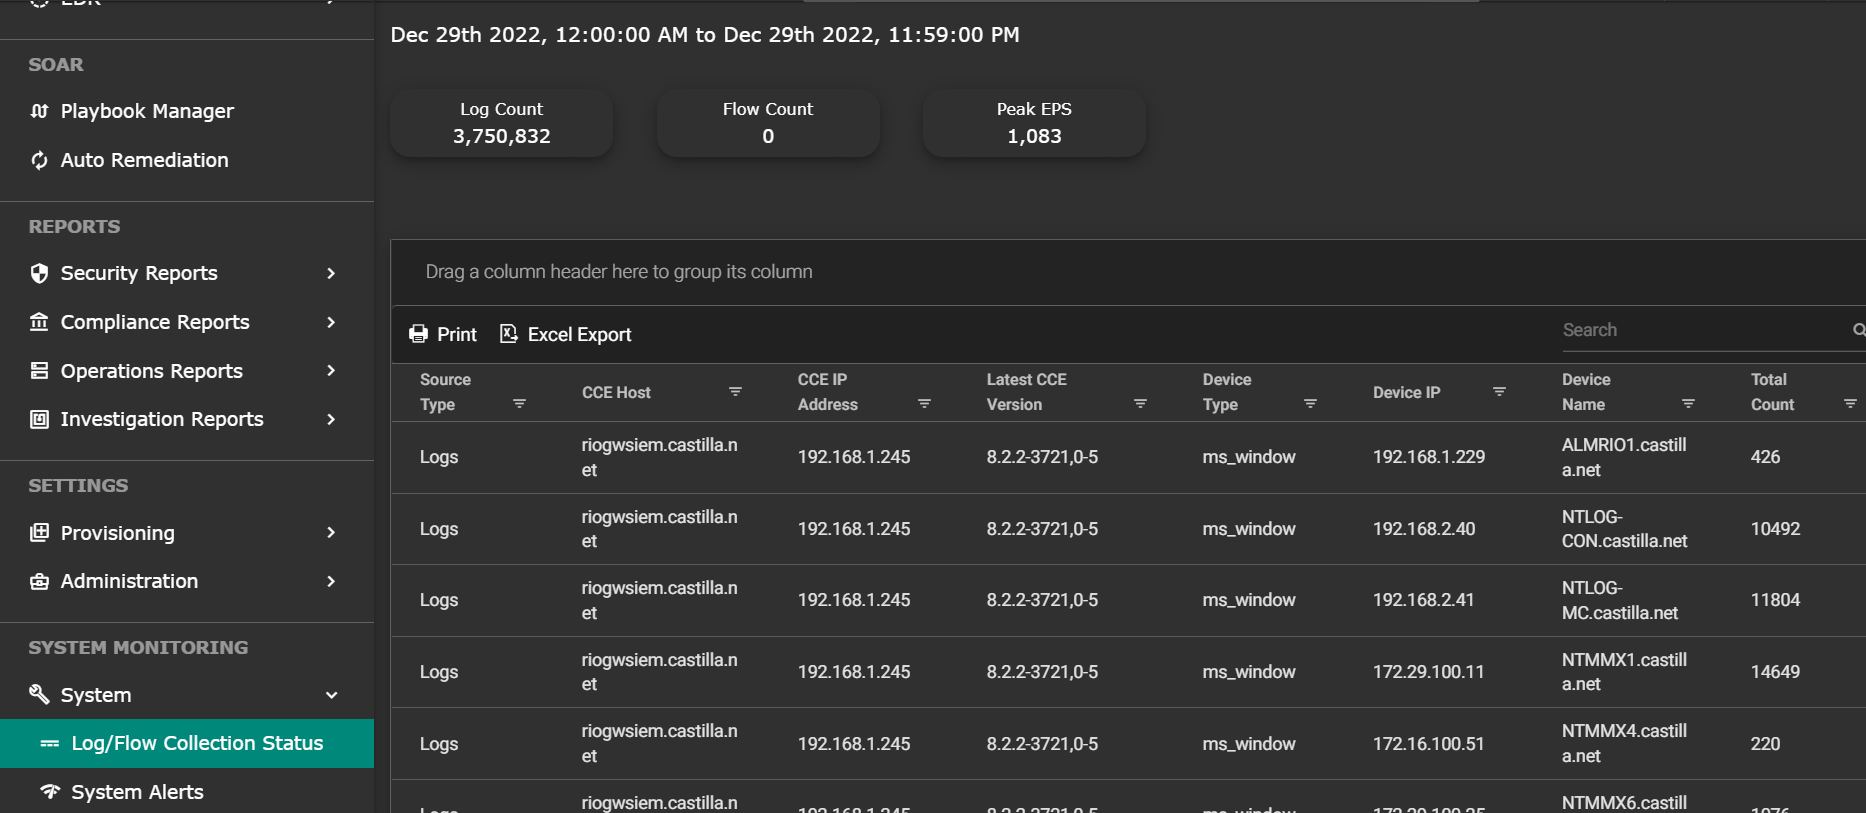
Was this article helpful?
That’s Great!
Thank you for your feedback
Sorry! We couldn't be helpful
Thank you for your feedback
Feedback sent
We appreciate your effort and will try to fix the article